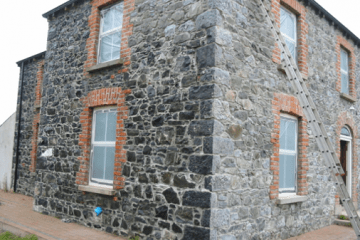
The first edition of what we hope will become a regular feature moving forward, our Before, During & After blog series. Here we will showcase a summary of the work carried out by the team at McGuinness Building. Kicking things off, we have a property located along the Cooley Peninsula in Carlingford, Co. Louth. The main issue here, amongst other things, was the infiltration of Dry Rot into the floor joist ends.
Before
Long before our specialist team inspected the property in question, an external lime based render was in place. It was eventually replaced as it showed signs of deterioration. Upon removal however, the stone was left exposed and subsequently sandblasted and pointed with a sand/cement mix. Meanwhile, extensive plastering work was carried out on a number of internal wall surfaces. The plastered internal wall surfaces were pointed or papered over.
During
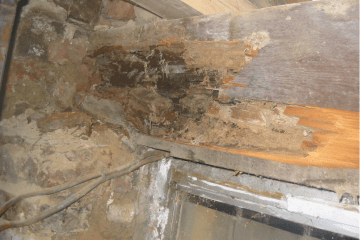
Fast forward four years and the team surveyed the property for the first time. A series of damp patches were now visible on the walls at both low and high levels. Along with the appearance of loose wall paper and the presence of a series of mushrooms in ground and first floor rooms.
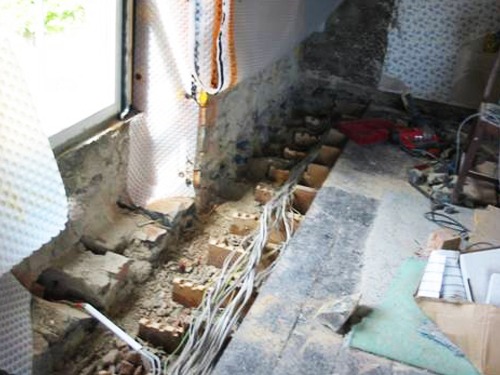
It quickly became apparent to Harry and Stephen that Dry Rot was attacking floor joist ends and timber heads above windows at ground and first floor level. There was also the issue of widespread damp penetrating through all of the external walls. The damp and dry rot formed as a direct result of the stone being sandblasted and unsuitable material then being used to point the stonework.
Re-plastering the external wall was not a viable option. It would have required the entire removal of the sand/cement painting before the re-plastering could take place. This would have been very expensive to our client.
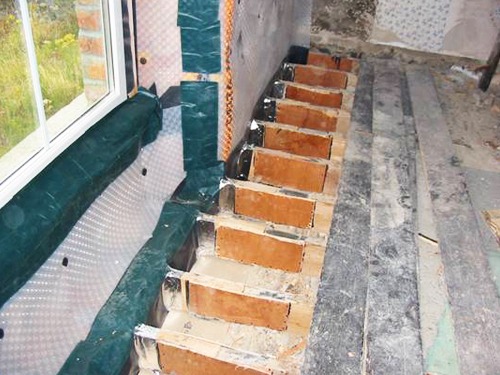
After
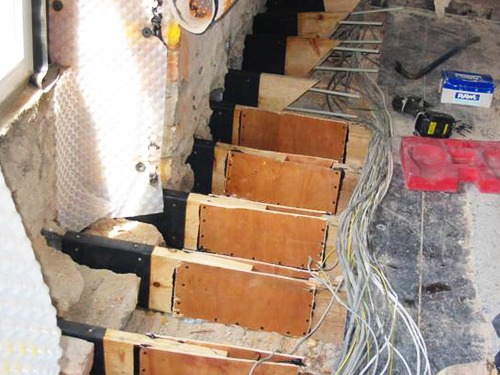
Instead, our remedial work consisted of applying a breathable water repellent to the external stonework and killing the dry rot in the walls. Along with, carrying out repairs to affected floor joist ends and lining the internal surface of external walls with a membrane system and dry lining finish.
I hope you enjoyed this first edition of the Before, During & After blog series. If you would like to find out more about our dry rot treatments please visit our website or get in touch, we’d love to hear from you!